Showing posts with label Presentation Tools. Show all posts

Sunday, November 7, 2010

Beyond Duct Tape - Web 2.0 Presentation and Multimedia Tools


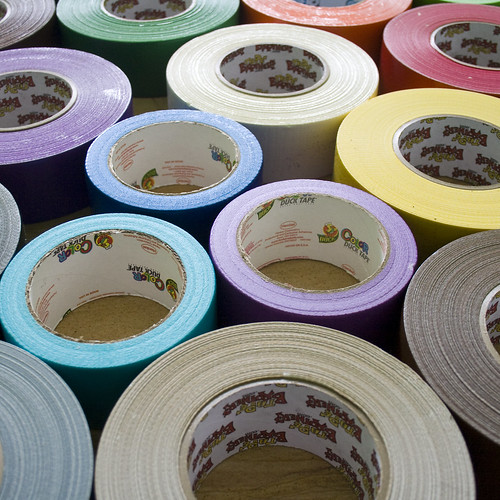
duck tape party supplies 2 - all you can eat
woodleywonderworks' photosteam via flickr
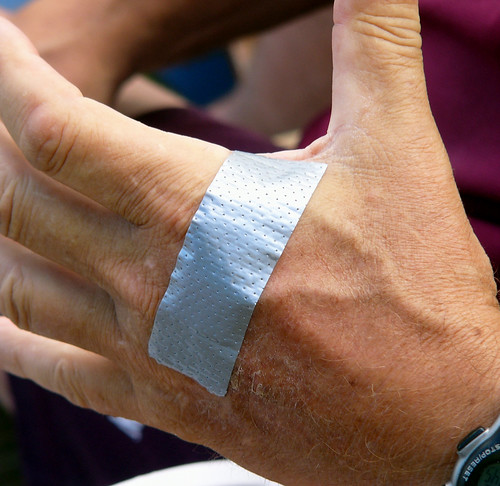
Duct tape is an amazing piece of technology.  It is the one universal tool that is effective and doesn’t take a lot of knowledge to use.  However, it does take an open mind and a little imagination.  I remember watching a show about how a guy camping in the remote wilderness had fallen and gashed his knee on the terrain.  He used duct tape to temporarily treat the wound that actually required stitches (I automatically imagined the removal of the duct tape – I’m cringing at the image).

Duct Tape Bandage
ktylerconk's photostream via flickr


I also think of the vehicles I have seen driving down the road with duct tape covering a broken window, or holding a bumper on.  I’m sure it doesn’t meet the automobile safety standards, but the duct tape does the job.
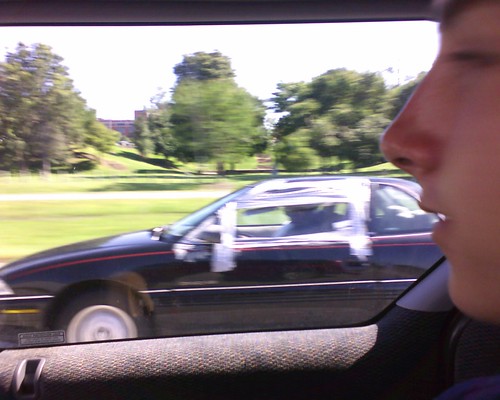
09-09-05_1516
vasto's photosteam via flickr


Once, when I was working at an assembly line job, an electrical fire broke out near my station.  The mechanic came racing down to attend to the issue.  He was searching for the tool necessary to fix the issue.  I asked him why he didn’t have duct tape with him – I was under the impression any mechanic worth a lick would have that in his tool box.  He just laughed...and pulled some out.

"You will pay hundreds of dollars for some duct tape."
DaveFayram's photostream via flickr
 So, that leads me to presentation tools and multimedia tools for Web 2.0 – just give me the duct tape!  I can do wonders with it.  I have seen its value and know its versatility.  I have clapped as principals were taped to gymnasium walls with duct tape(presentation for a charity fundraiser), Halloween costumes (did you know the Tin Man from the Wizard of Oz is the same tone of grey as duct tape?), science board presentations taped for added stability, and numerous other presentation variations of its use.  And it is simple – cut off a piece and stick it on until you get the results you wanted.
Initially, this was not the case for Web 2.0 presentation and multimedia tools for me.  I was stressed about the Web 2.0 adventure.  It seems like the more I learn, the less I know.  It takes time to learn all these tools.  Sometimes things go smoothly, and often (for me) they don’t.  It is always easy in hindsight, but I am a stress eater and right now, my hind is a sight!
Chris' foot (duct-tape provided by Jonny)
mattbuck4950's photosteam via flickr
I did take a couple days off to collect myself, to refocus enough to get me through the next few posts.  This is hard, because I feel like I have already failed.  I feel like what I discover about presentation tools will never be enough, even though I know “enough” is never achievable in the Web 2.0 world.  It is an endless cycle of catch up and fall behind.  I am duct taping my wounds so I can finish the journey.  At this rate, I could end up resembling a Web 2.0 mummy.
My journey began with what I knew about Web 2.0 presentation and multimedia tools: very little beyond PowerPoint.  I have seen a Prezi.  I have attempted one Glogster, but I’m sure I didn’t do it properly and was left with a very basic poster.  I have heard of Google Earth, but unfortunately the professional development I am registered for doesn’t start until November 17th. 
When I looked at the list of what I needed to look at for this next post, I was overwhelmed.  Here is what is suggested;
·         Animoto
·         VoiceThread
·         Prezi
·         Google Earth
·         Vuvox
·         Jing
·         Glogster
·         Zoho
·         Openzine
·         Toondo
·         Mindmeister
·         Flipbook
·         Bitstrips
·         Comic Creator
·         Xtranormal
·         Slideshare
·         Digital Mapping

I explored Animoto, VoiceThrea, Prezi and Google Earth a little more thoroughly, so the information regarding these tools are in separate posts.  However, I dabbled briefly in a few others and some examples of my efforts are below.

Xtranormal:  I played with Xtranormal briefly last night.  It is very cool.  I just wish I could get this lady to rap like some of the showcased productions.  Kids would love working with dialogue using this tool.  I could share the presentation in a number of ways, but I chose to publish it to YouTube.  I can't wait to show my own kids, because I think this may be one of the things they want to play with online.  As a note, there did seem to be some settings I wasn't sure about - maybe not "G" rated - something I would have to dig into further before I gave the go-ahead to students and my children.


Vuvox: I have played with this a little.  Finally got the music to load.  I will have to play with it more to get it to my liking, but here is my first attempt.

http://www.vuvox.com/presentations/0311247f65

I also came across a few other suggestions in the Edutopia's Back to School Guide:  Jump Start Learning with New Media, which you can download for free from http://www.edutopia.org/back-to-school-classroom-resource-guide
It contains great suggestions for setting up your digital classroom.  I explored a number of them and have included a few quick examples, and a quick overview of a few of them here.  These are a few of the more interesting presentation and multimedia tools:


Invitation Template:

Hi Guys n Gals
I have created a Wallwisher wall. It is a simple webpage where we all can post our messages easily.
So simply go to http://www.wallwisher.com/wall/kscheidy and post your message there.
Happy Posting!
kscheidy

This is such a neat tool.  I can add sticky notes in the form of audio, text or an image.  If you go to the wishwall I created you can already see links I have found for using the wishwall, links other people provided to Web 2.0 tools and manuals.  As indicated above, I can invite people to my wishwall and they can add to it.  I have the ability to moderate each post before it is posted to the wishwall.  I think this is a great organizational tool for personal and professional use.  Further, it is a great collaborative tool.
AnswerGarden is very simple tool to use for collaborative brainstorming.  It is a tool that can be used to determine what students already know before proceeding with a lesson.  It is a tool I can use on my blog to question people as they visit my site.  I created one and added it to my blog on the sidebar.  Try it out so I can see how it works!  Users can also have all the responses compiled into a Wordle, which is another favorite tool of mine.

Another tool similar to wordle is Tagxedo.  Check out the site 101 Ways to Use Tagxedo by Hardy Leung for an indepth look at the versatility of this tool.  This is a Tagxedo made from my blog - I simply inserted my URL address, chose the layout and font, and the result was this:


Another tool which is so fun and students would love when creating diagrams for presenting materials is SimpleDiagrams.  This video, How I'm Using "Simple Diagrams" with Coaching Clients by mavenaire demonstrates the ease of use and the effectiveness of this tool for communicating ideas.


This is an example of a SimpleDiagram I created:


Also worth checking out is Museum Box.  With this site you can create your own artifacts museum to display items.  You can include various forms of media in the boxes.  These boxes allow to you put artifacts or items to create various perspectives of an issue, event, person, or any other topic you wanted to create a case for. 

Of course, I only needed to explore several of these, not all of them.  I used duct tape to hold my eyes open as I pulled more all-nighters in my attempt to learn to navigate the rugged wilderness of the Web 2.0 presentation and multimedia tools.  The exploration posts for this week are titled:
  • A Gentle Stream – Animoto
  • A Beautiful Sunrise - PowerPoint or Prezi, What's the Difference? - Prezi
  • A Breath of Fresh Wilderness Air - VoiceThread
  • Get Me Out of Here - Google Earth
I also included brief posts on various other tools I played with:
  • Xtranormal
Learning about the tools definitely had its stumbling blocks.  For the most part, however, I was able to set up my accounts, upload files for the presentations, and create a basic product.  As I played with each tool more, I learned tricks and tips which improved the final product or simplified the process.  The one tool I struggled the most with was Google Earth, but that was more due to my Internet speed than the tool itself.  Quite honestly, all said and done, Google Earth was the most versatile tool with endless possible uses.

These tools are definitely fun when everything is working well.  I know my kids will enjoy playing with these tools at home - as an online toy and for entertainment.  However, as a parent and a teacher, I see benefits in these tools which are limited to neither school nor home.  I am better preparing my children for the Web 2.0 world if I am introducing them to these tools for personal and professional use (professional in their case is school).   

Cheryl Lemke, president and CEO of Metiri Group (consulting firm advocating for the advanced use of technology in schools), writes about the implications for education due to the way we learn (new research is available due to new functional magnetic resonance imaging (fMRI).  A very simplified summary of her research is that our working memory processes visuals differently than text and sound, similar to two different channels.  Additionally, our working memory has very limited capacity for both.  This affects the way educators teach on many levels.  Lemke cites work by Mayer & Moreno (2003) which indicates that "people learn better from combining visuals with text and sound than through using either process alone, provided the design of learning resources follows certain multimedia principles" (Bellanca & Brandt, p. 248).  Lemke then introduces the seven principles related to multimedia and modality:

This set of seven principles related to multimedia and modality is based on the work of Richard Mayer, Roxanne Moreno, and other prominent researchers (Chan &Black, 2006; Ginns, 2005; Mayer, 2001; Mayer & Morena, 2003).
1. Multimedia Principle:  Student retention is improved through a combination of words (verbal or text) and visuals, rather than through words alone, provided it doesn't introduce redundancy of content.
2. Spatial Contiguity Principle:  Students learn better when corresponding text and visuals are physically integrated rather than separated.
3. Temporal Contiguity Principle:  Students learn better when corresponding text and visuals are temporally synchronized rather than separated in time.
4. Split-Attention Principle:  Students learn better when extraneous words, pictures, and sounds are excluded rather than included.
5. Modality Principle:  Students learn better when text is presented auditorily as speech rather than as on-screen text.
6. Individual Differences Principle:  Design effects from these principles are higher for low-knowledge learners than for high-knowledge learners, and they are higher for high-spatial learners than for low-spatial learners.
7. Direct Manipulation Principle:  As the complexity of the materials increases the impact of direct manipulation of the learning materials (animation, pacing) on transfer also increases.
Students engaged in learning that incorporates high-quality multimodal designs outperform, on average, students who learn using traditional approaches with single modes.  This was borne out by a recent meta-analysis that revealed multimodality (the use of text or sound and visuals together) can positively shift achievement - provided the multimedia principles are followed. (Bellanca & Brandt, pp. 248-249)
Lemke further states that the meta-analysis also indicated that non-interactive multimodal presentations resulted in a 21 percentile increase for those originally performing at the 50th percentile, and interactive presentations resulted in a 32 percentile increase.  (Bellanca & Brandt, p. 249)

These are interesting findings.  The principles are very similar to the requirements Bernajean Porter has for her Digital Storytelling - Digitales workshop.  But on a larger note, does it really matter?  Because, Lemke states, the Internet is here to stay - it is a place for recreation, communicating and leaning (Bellanca & Brandt, p. 243).  Therefore, presentation and multimedia tools will be sticking around - without the duct tape!

Resources

21st century skills: Rethinking how students learnBloomington, IN: Solution Tree.
Bellanca, J., & Brandt, R. (2010).

Saturday, November 6, 2010

Get Me Out of Here - Google Earth

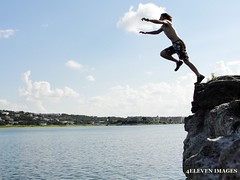
Wrap me up in duct tape - I have hit the point in the journey that is making me panic. I am at a cliff and haven't brought my climbing gear. 
Cliff diving with JT
4ELEVEN images' flickr photostream
This was my initial reaction.  Why, you ask?  I didn't know what to expect and my web browser was slow to load.  I never gave the screens enough time to load fully, so I only ever got the first or second layer of the image.  It wasn't until I was reading through Choosing Web 2.0 Tools for Learning and Teaching in a Digital World by Pam Berger and Sally Trexler (2010) that I realized this.  Here's why.  I would load a page as suggested in the book.  Of course, I didn't see anything too exciting at first, so I would return to the book to read some more to see what I was missing.  As I was doing this, the screen had more time to load, and when I looked up...VIOLA!  It was a different experience.  So I continued my exploration, removed a few layers of duct tape, and soon understood the richness of Google Earth. 

My first experience with the tutorials, prior to the VIOLA moment above, was flat.  I wasn't seeing the depth of this tool.  However, as I worked through the steps outlined in Berger and Trexler and gave screens time to load, the information I had learned in the previous tutorials on the Google Earth site now made more sense.  These tutorials are worthwhile (there are Beginner Tutorials, Advanced Tutorials and 3D Tutorials) to get an overview of Google Earth and the navigation throughout the site.

I began with the Sightseeing Tour under My Places tab on the sidebar in Google Earth.  This time I gave sites time to load completely (this also means be patient as you zoom in or change perspectives when viewing locations).  Perhaps this isn't an issue with faster browsers, but something to be aware of - buffering.  As I progressed through the tour I was able to zoom in to see 3D buildings (computer generated), view pictures which have be geotagged to the location, and connect to links identified within the geotagged images (displayed on the tag accompanying the image).

It is very easy to create your own tours (placemarking) and include information (images, links) at specific points.  This is demonstrated in the video recommended by Berger and Trexler (p. 200), Google Earth Creating Paths:


I next explored Google Maps.  This was something I was aware of and had used multiple times (particularly to find arenas when running my kids to ringette and hockey).  I have also created a map to give directions to our house.  A great video to take you through these steps is Google Maps Introduction:


The next feature I explored was the Google Oceans.  I focused initially on the Titanic in the North Atlantic Ocean.  The tour takes you below the surface of the water to where the wreckage lies on the bottom of the ocean.  When you click on the placemark, you find a link to the National Geographic site which includes photos, videos, interactive activities and other information relevant to this location on Google Earth.  The following video also gives an overview of this feature with other topographical features.


Berger and Trexler also summarize many of the content layers available in the "Ocean" panel (p. 193-194).  As they have describe, these include:
  • Explore the Ocean - provides an oceans overview in a 7:36 minute video, sponsored by National Geographic Society and narrated by Sylvia Earle.
  • National Geographic - contains magazine quiz (bubble with image and ocean facts with a question and answer options to be submitted) and ocean atlas.
  • BBC Earth - offers the viewer a tour of ocean places with beautiful images, videos, and additional links.
  • Cousteau Ocean World - provides selected videos in pop-up bubbles, with text and links.
  • Ocean Sports - features surf, dive, and kite surfing spots, with links to additional photographs and comments by surfers, deep sea divers, and kite surfers.
  • Shipwrecks - pinpoints shipwrecks worldwide, providing brief text information in a bubble, with a link leading to more information, including ship name, weight, nationality, place launched, service history, and cause of sinking.
  • Ocean Expeditions - takes the viewer on a tour of expeditions, with links to sources of more detailed information.
  • Marine Protected Areas - shows protected areas worldwide with stories, facts, links, videos, images, and allows for information to be added by the user.  Two such examples are the Great Barrier Reef Park and the Marine Mammal Sanctuary of the Dominican Republic.  Areas included are protected for various reasons.
  • ARKive: Endangered Ocean Species - contains images or videos of endangered sea life with its status, information about the creature, threats against it, placemark details, and links to more information.  This resource can be located under the global awareness layer pane.
  • State of the Ocean - feature ocean observations, sea surface temperature, Arctic Sea ice, human impacts, dead zones (marine zones without enough oxygen to sustain life), MBA: Seafood Watch, and MCS: Fish to Eat
  • Animal Tracking - indicates tagging information such as tag number, gender, length, weight, animal facts, photo, and swim with me video for Global Tagging of Pelagic Predators program.
  • Census of Marine Life - provides statistics and influences on marine life.
  • Marine Tharp Historical Map - gives a map of the ocean floor charted by famed oceanographer Marie Tharp; downloadable and viewable; can zoom and pan.
  • Underwater Features - pinpoints reefs, troughs, shoals, seamounts, banks, ledges, basins, canyons, holes, and ridges worldwide.
There is also Google Sky, Google Moon,and Google Mars.  These sites provide imagery and information that completely supports the grade 6 Sky Science Alberta curriculum.  


A quick search through the Educational Gallery will provide numerous other KML or KMZ files which are already made up and ready to be used.  There is also the genereal Gallery which includes the Educational Gallery and more.

I did play around with Picasa and geotagging my photos.  This was interesting to do.  I tagged photos that were taken when we lived at our first home, and then photos from our second home.  I also tagged some photographs taken while on vacations at various locations.  It was interesting to view the larger picture of where we have travelled and what we have experienced.  As indicated in Berger and Trexler, "the benefit of using geotagging is that it provides another means of organizing digital resources and thereby provides better seraching capabilities for such resources at a later date" (p. 181).  I can see benefits of this as the number of digital photographs we take and keep increases.

This tool is incredible relevant to inquiry based learning.  As Berger and Trexler indicate, it is helpful in engaging students in inquiry based learning (p. 183). 
Rather than targeting one phase of the inquiry process, Google Earth helps students to gain a more global perspective.  It places imagery and other geographic information on a student's desktop while integrating with multiple curricular areas: it supports practically all the geography standards, several mathematics standards, many of the science standards and technology standards.
Further, Berger and Trexler site Nine Reasons to Use Google Earth (p. 184):
  1. Provides a wide rang of information in a geographic context.
  2. Supports inquiry-based activities.
  3. Applies to studies across the curriculum - history, literature, math, science, and current events.
  4. Incorporates images, audio, video, and text in maps.
  5. Enables users to create, display, and share their own data.
  6. Helps students visualize patterns in their city, state, country, and the world.
  7. Supports visual literacy.
  8. Encourages collaboration.
  9. Supports various learning modalities.
As a parent, I feel these apply to the learning we do at home as well.

Reverting to my example of the novel study I am doing in class, I had previously stated including visuals of the settings used for the story line would have enabled the students to develop a deeper understanding how the setting contributes to the story.  Using Google Earth, I could create a Tour for the students to take, including all the necessary "geographical metadata" necessary to "add more depth and meaning to digital resources" the students viewed (Trexler & Berger, p. 181).


nz_auckland_bungy_jumping_IMG_2069
Stash Kulesh's flickr photostream

Transformation - I am now using the duct tape to create a bungy cord.  This is an exciting tool to leap from the cliffs with!

Resources

Berger, P. & Trexler, S. (2010).  Choosing web 2.0 tools for learning and teaching in a digital world. Sanata Barbara, CA: Libraries Unlimited.

Friday, November 5, 2010

A Gentle Stream - Animoto

As ready as it was possible to be, I began my exploration into the intimidating terrain.  I wasnt' sure if I would be experiencing a fierce river or a gentle flowing stream.  I had my necessary supply of duct tape.  I used it immediately...to help me keep my wits about me - I taped them in!


The Duct Tape Princess
Killfile's flickr photostream
Animoto was the first leg in my exploration of the Web 2.0 wilderness.  It is a "Web-based video creation tool that allows users to upload digital photos, add background music, and /or text on images, to create an animated video" (Berger & Trexler, p. 139).  I just dove in – I signed up for an account, uploaded some pictures, chose some music from their copyright free bank of songs, and created my first video from slides.  Being as this was the free version of Animoto, I was limited to a 30 second presentation.  This is fine for experimenting with the tool, but is really only a taste test to get your mouth watering. 

I also viewed the Learn More in 60 Sec video on the homepage of Animoto.  It was in this video I learned about adding text and spotlighting pictures.  It was a helpful video to demonstrate the basic features of Animoto plus some of the upgrade options.  More templates for the video and greeting templates are available under the All Access and Pro plans (fee accounts).
What are the benefits of this tool to me personally?  Here are a couple I can imagine at this point:
  • Fun way to share photos and videos
  • Another tool for digital storytelling
  • It can bring the learning occurring at school into our home
  • A portfolio for my children’s learning each year
  • Easy to share on Facebook, Twitter, YouTube and via email
  • I can embed my video into my blog
As indicated, I could have upgraded to an All Access account for a fee.  This would have allowed me to created unlimited full length videos.  Or, I could have purchased one full length unlimited video for $3.  The other option was to set up an educators account, but you have to apply for it, and the approval process takes time.  In addition, you need to have a URL address to link the education account to – perhaps to verify it is fact being used for educational purposes.  It has been two weeks, and I am still waiting to hear if I am approved. 
Animoto for Education - Bringing your classroom to liveIn the meantime, I have been checking out the Animoto for Education case studies site to explore the way other educators are using Animoto in their classroom.  As indicated by Berger & Trexler, it is a great tool to use with project-based activities (p. 139).  It ranges from Anti-bullying presentations to year end science fairs to Discovery Education Science Podcasts.  It showcases the mash-up of a variety of Web 2.0 tools.  For instance, the End of Year Science Project required students to use PowerPoint slides (the visuals) and Audacity (the audio), which were then uploaded to Animoto to create the video presentation.  Discovery Education Podcast enhances a podcast with images which contribute additional information resulting in a more informative presentation.  In the Capturing Watersheds Experience Animoto, Holly Muffet provides a link to an incredibly detailed lesson plan to demonstrate how she integrated an Animoto creation into her watershed project.  As a side note, this link is to Learn It, Teach It, which has other lesson plans available and basic technology skills video tutorials.  Maria H. Andersen, a college professor who created the Funky Function Notation Animoto to liven up a functions lesson, explains how she used SnagIt to transfer her PowerPoint slides to Animoto.  As she describes, the creation of an Animoto presentation is simple.

To maximize the experience with Animoto, you can also opt into a subscription via Twitter to learn about new features and partnerships of Animoto.  So I signed up.  Animoto is like the gentle stream running through the wilderness - a pleasant and refreshing experience.  (Although in my example, you will only get 30 seconds to experience this!)

Create your own video slideshow at animoto.com.

The duct tape can be saved for another day because Animoto is just as easy to use.  The Web 2.0 wilderness is a shade less intimidating after this experience.  I continued to paddle onto my Prezi exploration.

References

Berger, P. & Trexler, S. (2010).  Choosing web 2.0 tools for learning and teaching in a digital world. Santa Barbara, CA: Libraries Unlimited.

A Beautiful Sunrise - PowerPoint or Prezi - What's the Difference?


Sunrise Paddling on the North Canadian River
FreeWine's flickr photostream
 Although you will find a zebra in Prezi, it is not the kind you normally find in a wilderness.  However, this zebra does allow you to maneuver within Prezi fairly effectively.  I had seen Prezi before and had chose to avoid that terrain at the time - if it was a piece of nature, I would have compared it to the sky which indicates a storm is coming.  However, after my trek though this part of the woods, I found it to be a beautiful sunrise!

Getting started with Prezi is fairly smooth.  Prezi has included a few video tutorials to introduce the basics and some tips on creating effective Prezi presentations under their Learn page.  I feel the first video was helpful to me because the format of a Prezi is not the traditional linear format I am used to.  As it was, it took me a little bit of trial and error to figure out the layout (very spatial versus linear - unless you choose to make it a linear presentation).  The presentation space appears to be endless, and I only figured that out as I continued to add to my presentation.  I didn't realize I could add images until I viewed the tutorial.  I'm sure I would have figured it out, but the tutorial let me start creating with a basic idea of what I was doing.  It also took me a few attempts at typing to identify how to type different fonts, choose different displays, move images and text around, adding frames and sizing all of these (enlarging and reducing).  However, the zebra control is easy to operate, which is required to do some of this.  

but.... duct tape works for everything else.....
the mad LOL scientist's photostream via flickr

I was learning about Prezi while at work today and using it to create a presentation for a novel study I am teaching in class.  I showed the tool to a colleague.  When explaining what the tool was I mentioned that it was much like a PowerPoint presentation - just a little more style.  As Tony McNeill writes in his blog, The Digital Migrant: Prezi, PowerPoint, multimodality and the "logic of the image" (Nov. 10, 2009) PowerPoint does receive a lot of bad press.  It is the duct tape of the technological savvy presenter.  McNeill writes about the linearity of the PowerPoint presentation, the sequential presentation of bullets of information and the teacher-centered delivery of knowledge.  He questions if Prezi is not the same linearity, only packaged in a new form.  I initially agreed until I read a quote on his blog:
A more positive take on Prezi is that allows us to think through the possibilities creating texts informed by what Gunther Kress calls the 'logic of the image'. Here is Kress on the 'logic of the text' and the 'logic of the image': 

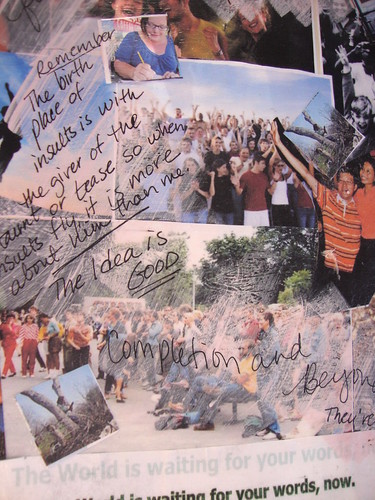
The Idea is good!
juliejordanscott's flickr photostream

The two modes of writing and of image are each governed by distinct logics, and have distinctly different affordances. The organisation of writing – still leaning on the logics of speech is governed by the logic of time, and by the logic of sequence of its elements in time, in temporally governed arrangements. The organisation of image, by contrast, is governed by the logic of space, and by the logic of simultaneity of its visual/depicted elements in spatially organised arrangements. (McNeill, par. 11-12)
In the Prezi I created for my novel study, I felt the Prezi captured a concept that a PowerPoint couldn't.  My topic was the themes in the novel Artemis Fowl by Eoin Colfer.  When I looked at the presentation as one complete picture containing smaller elements, I felt it represented the complexity of the themes woven into the story.  This is not a linear concept, but rather one that invites entry into the presentation at any point. 


I have created a linear presentation, but I also have the ability to leave that presentation to explore other ideas and connections - and in a smoother transition that I would have ability to do in a PowerPoint (we have all seen presenters exit a presentation to show us something and then try to return to where they left off as we sit there patiently waiting for the presentation to resume).  In a Prezi, I can maneuver non-linearly just as easy, and at any point.  The Seven Wonders of the Ancient World is a great example of this feature.  This Prezi contains video clips with audio (I haven't figured that out yet, but have found an article by Zoltan Randai in the Prezi Manual: Editing Your Prezi which explains how to embed video and YouTube into your Prezi), information portions and visuals.  You can also visit the Prezi Manual to learn how to do more than the basics, and troubleshoot any problems you may encounter.  This is also where I discovered how you can insert sound into your Prezi presentation.

I did find a video which explains how to transfer a PowerPoint to a DVD, and in this video it demonstrates the process for converting a slide to a jpeg photo:


While all these are things that can be presented in a PowerPoint, I was able to interact with the screens.  I could zoom in when I was curious about a specific picture (maybe you can do this in PowerPoint, but I haven't done it).  I could zoom out of the presentation and choose another path of interest.  I wasn't forced to follow a linear path - this is comparable to how we surf the Internet.  I think the Prezi invites exploration, whereas the PowerPoint suggests the viewer is an audience in receiving mode.


As I was learning about Prezi, I kept thinking that is a tool I would likely use only for professional presentations.  However, after viewing the Seven Wonders of the Ancient World, I thought it would be a great way to present a trip.  My brother has taken several trips, and it would be an interesting way for him to show the pictures, maps and give an explanation for each.  As a viewer of his Prezi, I could maneuver to parts that interested me, and explore them as briefly or deeply as I wanted to.  However, I could also play the Prezi, and allow his order of presentation to unfold. 

Another example which I think exemplifies the effective potential of this tool is "Mixing Mind and Metaphor - Talk by James Geary, given at TED Global 2009 July. Prezi was co-created by James and Adam Somlai-Fischer.See the talk at http://blog.ted.com/2009/12/18/metaphorically/.  I have included the Prezi and the TED talks presentation he used it in to see it in action.  It is a very interesting presentation, by the way!


It is easy to share either by sharing the link, posting to Facebook or Twitter, or by simply emailing to others.

In the classroom, there are examples of how the tool can be used in various subjects areas on the Explore page.  I return to a comment MacNeill makes on his blog, it isn't so much the tool, but rather how you use it (Nov. 10, 2009, par. 13).  Some of the Prezis I watched could give a viewer motion sickness rather than better conceptual understanding.  I like it for the non-linear concepts, so can visualize the use in building background knowledge as long as the Prezi contained enough information to allow the viewer to explore in a non-linear fashion and find substance.  I would have also found it more versatile if I could have found a way to add commentary to it - something to play with and explore further later.

Overall, it is an interesting alternative to PowerPoint.  Originally I did not view this tool as versatile as other presentation tools, however the ability to mash-up video and audio within the Prezi does give it substance.  It definitely has a place for a particular type of presentation.


I continued my journey onto VoiceThread.

References


MacNeill, T.  (Nov. 10, 2009).  Prezi, PowerPoint, multimodality and the 'logic of the image' , retrieved from http://digitalmigrant.blogspot.com/2009/11/prezi-powerpoint-multimodality-and.html.


mrivera1. (2008).  PowerPoint to DVD by turning slides into JPEG format, retrieved from http://www.youtube.com/watch?v=KC5_7ZJq4iI.

Wednesday, November 3, 2010

The Story of Jessica - A breathe of Fresh Wilderness Air - VoiceThread


No more words
Katie Tegtmeyer's flickr Photostream
The third leg of my wilderness excursion led me to VoiceThread.  I was vaguely aware of this tool – something someone had mentioned in a conversation I only partially listened to.  Regardless, it was terrain I was not familiar with.  (Have I packed enough duct tape???)

This is my experimental piece - The Story of Jessica.  Jess is our latest addition to the family.  Just like all the others, she was a surprise (I have to know people better before I share the personal details, but there is a humorous story for each child - only the ladies on my ringette team know them all!)  What I share here is the arrival of Jessica (whom I really wanted to name Darby, my maiden name, but my husband couldn't get past picturing my dad and brother when he said the name).  I used these pictures to create the VoiceThread, and to play with the voice recording and drawing tools.  I don't start to experiment with the drawing tools until the last several slides, when I begin talking about the Corel PaintShop Photo Pro photo editing tools I was using (which I love - I have the Pro X2 version, but the newest version is the Pro X3 and was highly recommended in the workshop I took on Digital Storytelling with Bernajean Porter).


Thousand Island Lake, Ansel Adams Wilderness
chucklepix (Steve)'s flickr photostream
 The duct tape can stay in the bag for this presentation tool - there were no wounds.  If Animoto was the gentle stream, then VoiceThread is the fresh wilderness air - refreshing to breathe and a sense of clarity follows.  The process was again simple - the creators of these tools must know people like me, lacking patience and technological savvy, are using them. 

First, I created an account.  I tried to set up the free Pro VoiceThread account - Berger and Trexler (2010) indicate the Pro account is available to teachers at no cost (p. 138) when you sign up with your school email.  I set up the free account for now, but if I were to use in the classroom, I do recommend the Pro account - it allows you to create a protected account which all students can use (even if they are under the age of 13 which is the age required to set up their own accounts).  This assures the privacy of the account and for the participants (Berger & Trexler, p. 138). 

Next, I uploaded my pictures, arranged the order of the pictures and then added my voice recordings.  I figured all of these steps out without tutorials and on my first try - the steps really are fail proof.  I previewed my recordings and if I didn't like the recording I simply "cancelled" it and recorded a different one.  After I was comfortable with that feature, I experimented with the drawing tool.  Again, after the first or second use, it became a natural tool to use while recording your comment, enabling me to clearly identify which aspects of the slide I was referring to.  It was similar to how I would teach using my Smartboard in my classroom.


I did look at a tutorial about Video Doodling and this is where I made my first attempt at participating in someone else's VoiceThread.  I was able to post this VoiceThread to the sidebar of this blog using the embedding feature within VoiceThread.  This feature makes it easy to share the VoiceThread on a number of different platforms.  Just as a note, the VoiceThread was too large for my sidebar, but I was able to move it to different locations on my blog on the "design" page.  I didn't like the location, so I copied the HTML text from the sidebar and inserted it into my blog.  Below I have the inserted collaborative piece as well as the link.


With the basics of how to create and publish a VoiceThread out of the way, I began to explore how I would use this tool.  VoiceThread has a Digital Library and Browse section which gives many examples.  Again, it is a mash-up of tools such as Audacity and PowerPoint and other video tools, to create an enhanced presentation. 

Berger and Trexler recommended Bill Ferriter's site and described it as a VoiceThread 101 site (2010, p. 135).  His blog is Digitally Speaking and really does cover everything you need to understand VoiceThread and the possibilities for it.  You will find resources for teaching students how to create a VoiceThread, proper etiquette, assessment tools and exemplars.  It is a great site to include in your initial exploration.

Another blog with extensive information regarding the educational benefits of VoiceThread is InfoTech4Learning.  The section is titled "VoiceThread in Teaching and Learning" and summarizes the uses as identified in several sources.  Again, this is a site recommended by Berger and Trexler (2010, p. 136).  Below is an excerpt from the section of "VoiceThread in Teaching and Learning" on InfoTech4Learning:

 
Benefits of VoiceThread according to Valenza and others:
  • simple and easy
  • focus on the content instead of the tool; can serve as a form of free writing (Ferriter)
  • requires simple hardware and minimal memory requirements (Langhorst); minimal tech-barrier (Ferriter)
  • encourages collaborative storytelling
  • ability to use powerful images - one or many
  • users can zoom in to see detail and out to see big picture (haven’t figure that one out yet)
  • ability to add text
  • easy to capture voices
  • inspires ongoing conversation about each image (Ferriter)
  • build fluency, precision and voice in second language
  • new dimension for creative analysis of historical photographs, maps and artifacts
  • ability to give and receive feedback from peers, teachers [formative and summative assessment], parents and other relatives, local and global community (Fryer)
  • effective tutorials (although I didn’t find them or the website design as intuitive as some of the other web 2.0 tool tutorials)
  • can be used “as a storytelling tool, a deep thinking tool, a research tool, an expository communication tool, and even an asessment tool” (Dyck)
  • allows for differentiation to accomodate different learning needs and styles, another option for struggling or reluctant writers (Dyck)
  • allows the teachers to seamlessly integrate digital collaboration into the currciulum (Ferriter)
  • provides another opportunity to discuss copyright
Finally, one last site Berger and Trexler (2010) recommend is Ned's Keeper "VoiceThread in the Classroom".  This site gives 40 ideas of ways VoiceThread can be used in the classroom.  Not to mention, it is a great site and is a member of Star Discovery Educator's Network.

Mobile phone camera
emrank's flickr photostream
On a personal level, I found a VoiceThread on High Speed Photography which was very informative.  There were VoiceThread by children about drawings, discussions of pictures and movies, to name a few.  As I was looking through these, I thought how wonderful it would be if there were a driver training study guide on VoiceThread (my daughter is currently studying to take her learners and finds it quite boring).  An interactive VoiceThread would be a great place for people studying to prepare for the test - visuals with descriptions, plus the opportunity to post questions/thoughts as well as listen to others' questions or thoughts would be very beneficial.  It would give the learner visual, auditory and kinesthetic learning experiences.


Dibrary: Digital Newspapers
mosman library's flickr photostream
On a professional level, the Digital Library provided many examples for classroom use, ranging from kindergarten to post-secondary and in any subject area imaginable.  I watched a VoiceThread of a commercial students created, demonstrating collaboration and participation by all group members, as well as feedback from classmates and the instructor.  There were reflections from post-secondary on-line learners who commented on the benefit of using VoiceThread to better communicate as a result of being able to interpret tone, phrasing, and other aspect of verbal communication which are not experienced in written communication.  Students felt there was less occurrence of misinterpretation of a post when it was done verbally rather than typewritten.  Other examples demonstrated interpretations of poetry, lessons in math and sciences, as well as many other subject areas.  One particular VoiceThread inspired me to use this tool with novel studies, reading circles and book clubs.  In Book Review: A Single Shard by Linda Sue Park from C Vidor, Linda Sue Park educates the reader about the background and setting with visuals and commentary which create a foundation to better understand the story. 


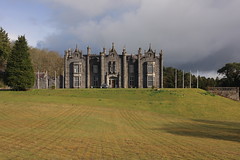
Belleek Castle - Ballina, County Mayo / Ireland
BlackBurnPhoto's flickr photostream
I am currently working on Artemis Fowl with my grade 8 students, and we just did a review of the exposition of the novel.  I could have added so much more understanding with visuals of Ireland and other setting used in the novel.  With deeper knowledge of elements contained within the novel, students can better understand the author's choices for aspects such as location and era.  Further, to have such a resource and make it available online to parents and students allows those who miss the lesson or need to review for clarification the ability to access the information outside the classroom.  As stated in the tutorials on VoiceThread, it also allows the discussion to continue after the class has ended.  Some of my students who are reluctant to participate in class may feel more comfortable with this type of participation.

The key ingredient with VoiceThread is the collaboration aspect.  It is a "free online, asynchronous media tool [...]that permits the user to import and display a variety of media for the purpose of group discussion" (Berger & Trexler, p. 133).  People can contribute thoughts and comments in several ways (phone, microphone, text, webcam, and audio) and can doodle on the slides.  The creator of the VoiceThread can choose which comments to display, enhancing the learning in the presentation.  Again, I refer back to the Artemis Fowl novel study.  I recently did a class on the plot diagram.  As a class we drew from the chapters we have already read to build pieces of the plot diagram.  VoiceThread would have been a great place to collaboratively discuss and build the diagram. Further, it would be a great resource for students' final essays and projects for the novel study. 

Breathing in deeply (happy I'm just breathing at all) and enjoying the trek!  Moving forward with my sites set on the bigger picture - Google Earth!


References

Berger, P. & Trexler, S. (2010).  Choosing web 2.0 tools for learning and teaching in a digital world. Sanata Barbara, CA: Libraries Unlimited.